

How to Install Rain Gutters: A Step-by-Step Guide
A properly installed rain gutter system directs rainwater away from your home and protects the foundation. Learning how to install gutters can be a valuable DIY project, saving homeowners money while improving water management. This guide will walk you through the process of installing gutters and downspouts, ensuring your system functions efficiently and prevents water damage.
Key Takeaways
- Proper rain gutter system installation directs rainwater away from your home, preventing foundation damage.
- Fascia brackets must be secured properly to support the gutters and maintain the correct slope for proper water flow.
- Downspouts should be placed strategically to prevent water pooling and soil erosion near the foundation.
- Regular gutter repair and maintenance help prevent clogging and prolong the life of the gutter systems.
- If the gutter run is longer than 40 feet, additional downspouts are necessary to ensure efficient drainage.
Tools and Materials Needed
Before starting your DIY gutter installation, gather the following tools and materials:
- Rain gutter sections
- Downspouts and elbows
- Brackets and hangers
- Screws and fasteners
- Drill and screwdriver
- Tape measure and level
- Gutter sealant
- Ladder and safety gear
Step 1: Measure and Plan the Gutter Run
Start by measuring the roof edge where the gutters will be installed. A standard guideline is to maintain a slight slope of approximately 1 inch for every 10 feet to ensure water flows efficiently toward the downspouts. If the gutter run is longer than 40 feet, plan to install additional downspouts at both ends for better drainage.
Step 2: Mark and Attach the Fascia Brackets
Mark the placement of the brackets along the fascia board using a level. To provide proper support, brackets should be spaced no more than 10 feet apart. Secure the brackets firmly, ensuring that the slope directs rainwater to the downspouts. Make sure that the attachment points are strong and can handle the weight of water-filled gutters.
Step 3: Cut and Assemble the Gutters
Measure and cut each section of the gutter to fit the gutter run. If needed, connect pieces with an overlap of at least 2 inches. Attach end caps to the end of the gutter to prevent leaks. Secure the gutter systems to the brackets, ensuring they align correctly and maintain the correct slope.
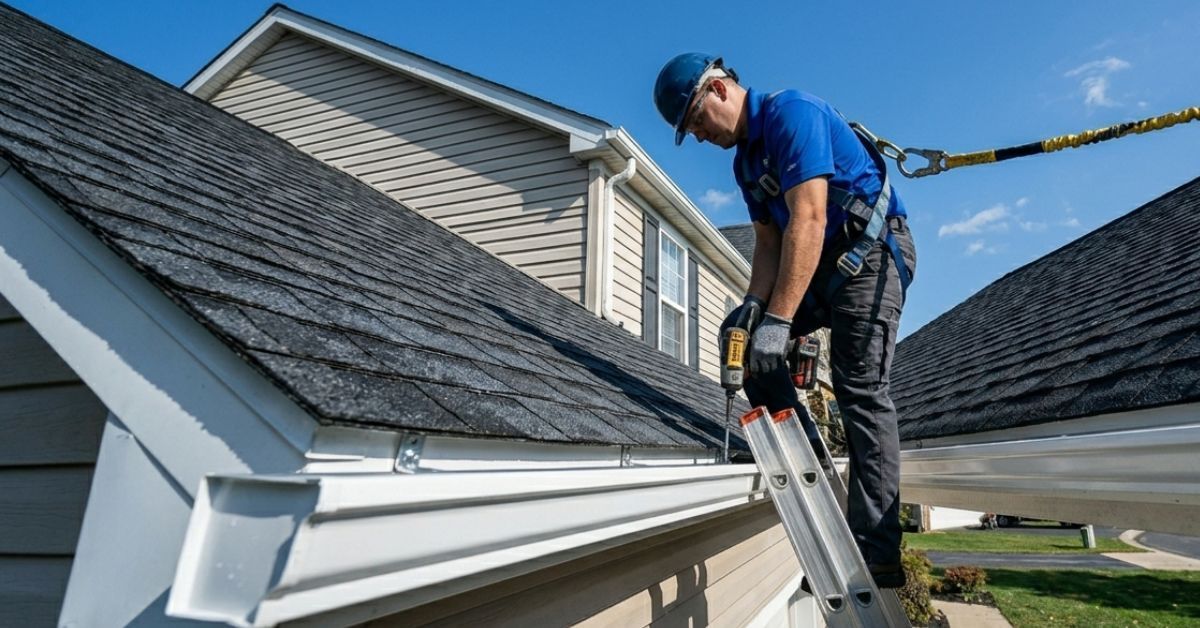
Step 4: Install Downspouts and Attach to Gutters
Position the downspouts at the planned locations, ensuring they direct water away from the soil around the foundation to prevent damage. Use elbows to connect the downspouts to the underside of the gutters. Secure them with brackets at intervals of 10 feet or less. Attach additional support at the rafter tails if necessary to keep the downspouts firmly in place.
Step 5: Secure the Gutters and Check for Proper Flow
Double-check the attachment points and ensure all nail heads are flush with the surface. Seal all joints and overlaps with gutter sealant. Test the system by running rainwater through the gutters to verify that the water flows smoothly to the downspouts and does not erode the soil near the foundation.
Step 6: Final Inspection and Maintenance Tips
Once installed, inspect the gutters regularly for debris buildup and signs of wear. Performing occasional gutter repair and cleaning ensures longevity and proper function. Keeping the gutters clear helps keep water flowing efficiently away from your home and prevents damage to your siding.
Common Issues with Gutter Installation
Improper Slope
An incorrect slope can cause water to pool in sections instead of flowing toward the downspouts. To prevent this, ensure a slope of 1 inch for every 10 feet of gutter length.
Loose Brackets
If the brackets are not secured properly to the fascia, the gutters may sag or detach. Make sure the brackets are spaced appropriately and firmly anchored.
Clogging
Without regular maintenance, downspouts and gutters can become clogged with leaves and debris, affecting water flows and potentially damaging your home’s foundation and siding.
Frequently Asked Questions
What is the correct slope for a gutter system?
The recommended slope is 1 inch for every 10 feet to ensure that water flows efficiently toward the downspouts.
How often should I inspect and maintain my gutters?
Regular maintenance should be done at least twice a year to check for clogs, loose brackets, and gutter repair needs.
Can I install gutters without fascia boards?
Yes, but you'll need to use rafter tails or roof-mounted brackets for secure installation.
What happens if my downspouts are too short?
Short downspouts can cause rainwater to pool near your foundation, eroding the soil around it. Consider using extensions to direct water further away.
How do I prevent my gutters from overflowing?
Ensure the downspouts are properly placed, keep gutters clear of debris, and maintain the recommended slope to allow water flow without blockage.
Conclusion
Installing a rain gutter system is a manageable project that can protect your home from costly water damage. By carefully planning the gutter run, securely attaching the brackets, and ensuring the correct slope, you can create an effective drainage system. Whether you're tackling this as a DIY project or hiring professionals, proper gutters and downspout installation is essential for maintaining your home’s foundation and exterior. Regular maintenance will ensure longevity, preventing costly gutter repair and damage to your roof, fascia, and siding.
For professional gutter installation and gutter repair, trust Gutters 4 Less to protect your home. Contact us today for expert service!
You might also like
Gutters 4 Less Blog